To generate public and private API keys dedicated to Office Protect in ConnectWise, you need to login to your ConnectWise Manage platform.
You can then either:
- Recommended - Generate public/private API keys on a new API Member which has been assigned a dedicated Security Role (restricted permissions) – Start at step 1
- Generate public/private API keys on a new API Member which has been assigned an Admin Security Role (all permissions) – Go directly to step 2
ConnectWise documentation about API Members:
- https://docs.connectwise.com/ConnectWise_Documentation/090/040/010/040
- https://docs.connectwise.com/ConnectWise_Support_Wiki/System/How_to_create_an_API_Member_and_API_Keys
1. Create a new Security Role
Either you can grant Office Protect an admin role (go to step 2), or create a new custom one:
- Go to System > Security Roles

- Click
 New Item
 - Enter a new Role ID, e.g. “OfficeProtect”
- Click
 Save
Save - Add the required permissions:
By default, all permissions are at “None”. You need to switch 4 of them to “All”.
Required permissions:
Module | Permission | Add Level | Edit Level | Delete Level | Inquire Level |
| Companies | Company Maintenance | None | None | None | All |
| Service Desk | Service Tickets | All | All | None | All |
- Companies – Company Maintenance – Inquire All allows us to retrieve your list of companies so you can match them with tenants.
- Service Desk – Service Tickets – Add All allows us to create new tickets on your platform, Edit All allows us to edit these tickets. We cannot have these permissions granted without the Inquire one.
Optional permissions:
Module | Permission | Add Level | Edit Level | Delete Level | Inquire Level |
| System | Table Setup | None | None | None | All |
| System | Member Maintenance | None | None | None | All |
These two permissions allow Office Protect to fetch the API user's default service board and the list of ticket statuses, so the Ticket Creation Settings section can be displayed in the configuration form.
- Click
 Save
Save
Note: we may require other permissions in the future as the product evolves.
2. Add new API Member
After the new Security Role creation:
- Go to System > Members

- Go to the API Members tab and click
 New Item
 - Fill out the form:
- The member ID, e.g. “OfficeProtect”
- The member Name, e.g. “Office Protect”
- The Role ID: the one you previously created “OfficeProtect” or Admin role if you didn’t create a new Security Role
- Service Defaults: in Default board, select the board in which you want Office Protect to create your events. If you don't select any board,tickets will be created in ConnectWise default board.

- If necessary, change the default values in the other fields
- Click
 Save
Save
3. Create new API keys
While you are on the freshly created OfficeProtect API member sheet:
- Go to the API Keys tab
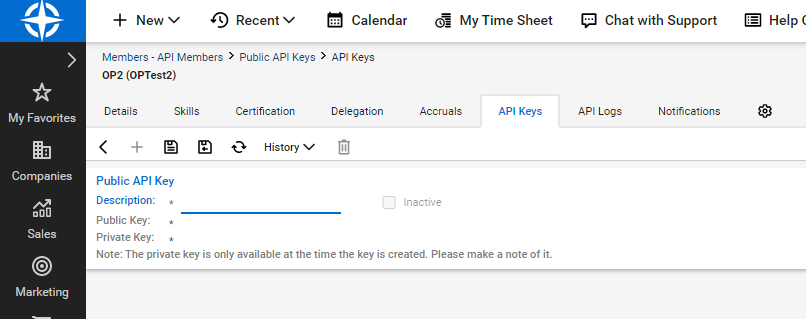
- Click
 New Item
 - Enter the API key Description, e.g. “Office Protect integration”
- Click
 Save: the Public and Private keys should be displayed below the description.
Important: Make sure you save the Private Key, as you won’t be able to retrieve it after closing the page